As you take a final weary step up the hill, you heave a sigh of relief. The lands before you are rich and fertile, perfect to set up a new home. Together, your people march forward, laying down their belongings and laying claim to their new home.

In Idle Town Master, you step into the well-traveled boots of a new, aspiring chief who has led their people far away from their old lands, and safe from the tyranny of their former leader. As the new chief of your people, it’s your task to raise a new settlement out of this wilderness and provide for your people with homes, food, security, and organization. Idle Town Master is available on both the Google Play Store and the App Store.
Idle Town Master is an idle city builder/management game that’s similar to titles like Kairosoft’s Dream Town Island. The game is very simple to learn, with intuitive gameplay and a decent tutorial. I should, however, forewarn you that optimal progression in this game involves watching a lot of ads to accelerate your progress. However, Idle Town Master is also nice in that the more you play, the deeper the game’s mechanics become and the more things you can do.
In this Idle Town Master beginner’s guide, we’ll be going over the following topics:
- Town Basics – gathering resources, building structures, upgrading your facilities, town goals, and migration.
- Optimal Resource Flow – how to streamline your resource gains, where to get free stuff, and so on.
- The Seat of Government – the importance of your castle and what the rooms here can do to help your towns develop more quickly.
Lastly, if you’re just looking to skim through the article, feel free to jump to the “Quick Tips” subsections. Now, let’s begin!
Town Basics
At its core, Idle Town Master is a very simple game where you gather resources, spend those resources to build a town, develop that town into a thriving town, meet the town goals, and finally move on to a new area to do it all over again, but better this time. While you’ll no doubt get the hang of the game after a few villages, it’s always good to go over the basics.
Quick Tips:
- The core resources are food, wood, and stone. The early game of most towns revolves around gathering these three resources and improving their generation rate.
- Food is for upgrading houses, which leads to more workers. Your people passively consume food over time; tap on a house to see your current consumption rate.
- Wood is for upgrading structures like houses and the sawmill. Wood can be refined into planks, which you’ll need for more advanced stuff.
- Stone is a tertiary resource used for building and upgrading structures.
- Planks and cut stones are required for rank-ups. Producing these will draw from your wood and stone stockpiles (respectively), so ensure that your supply can keep up with the demand.
- To build a new building, tap on an empty lot with a plus icon/dirt lot/sign on it, after which you just need to pay the resources and wait the timer down.
- Buying new copies of the same type of building (ex: houses) tends to be far more expensive in terms of both resource quantity and type. It’s usually a better option to upgrade the buildings you have first.
- To upgrade a building, tap on it, then tap on the upgrade icon. Each tap spends resources and grants you one count of the listed benefit; for example, if a sawmill says it gets “Production +1”, each tap of the upgrade button increases production by one.
- Once a building’s upgrade bar has been filled up, you can pay more resources to rank it up. Buildings with higher ranks have better base yields, allowing you to develop your town even faster.
- Upgrades do not carry between villages, including scale and gem upgrades.
- Some buildings may require other buildings to be at specific levels. You can tap on each of a building’s requirements, then tap on the hyperlinked text to zoom in on the required structure.
- Certain buildings – which I’ll call services – serve as requirements for further town development, such as bridges across water.
- Like your production structures, services can be upgraded, and each upgrade level usually provides a resource-specific generation bonus.
- Unlike production structures, services don’t grant incremental bonuses for upgrades. You need to fill all bars before a service’s buff is boosted.
- Your current town’s goals will be listed at the top of the screen. Complete all these goals to grow the town and move to a new town. Each goal grants you rewards.
- Once you’ve accomplished every goal in a town, you’ll move on to a bigger, better location. The more towns you found, the more mechanics you’ll unlock.
Starting Off
Most of the towns you’ll found start as dirt lots with a single crappy tent. No worries, every village must start somewhere. To build a successful settlement, we’ll need to gather the natural resources in each location and ensure that our people have somewhere to live, somewhere to work, enough food to eat, and so on.
The initial gameplay of each town revolves around the gathering of four key resources: food, wood, and stone.
- Food is required to upgrade basic housing, which will allow you to get more villagers, which in turn means more workers. Note that villagers also passively consume food over time. To see this consumption rate, tap on any house to see the per person, per house, and village-wide food consumption rate.
- Wood is required for basic buildings, such as houses, farms, and sawmills. You also need wood to make refined planks later on, which you’ll require for advanced construction.
- Stone is a tertiary resource that’s required for higher-level upgrades and buildings.
There are also refined resources that cost some of your basic resources:
- Planks are produced from wood, meaning that you need to increase your wood production to account for raw material consumption. This resource is usually needed for the first tier of upgrades in higher-level villages.
- Cut stone is produced from raw stone. As with planks, be sure your quarries can keep up with the demands of your stonecutters.
Building New Buildings
Buildings in Idle Town Master can’t be placed freely. There are specific spots for each building, which are usually denoted with a plus icon, a dirt lot, or a sign.
To build a new building, tap on the plus sign/dirt lot/sign, then pay the required resources. You’ll have to wait a bit (you can spend gems to rush a building if you really want to), and then bam, new building.
Note that placing new buildings of a type you already have (such as several houses) tends to be more expensive than upgrading your existing ones and may even require new resources. No, I don’t know why new tents need planks and stone. Just roll with it and prioritize upgrading the buildings you already have.
Upgrades
Buildings aren’t a one-and-done affair. They’ll need to be upgraded if you want them to function at peak efficiency. To upgrade a building, tap on it to bring up its info panel. After that, you can sink resources into different types of upgrades, each of which provides a variety of benefits to a building.

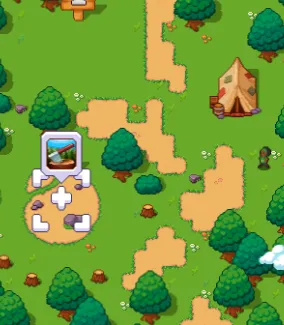
You should note that each tap of the “upgrade” button isn’t an instant upgrade; rather; it’ll fill part of the upgrade bar while conferring its full bonuses. In the image above, you’ll notice that upgrading the house increases population by one. That means that each time I tap the upgrade button, I’ll get one extra population. Not bad, huh?

Once a building has been upgraded enough (i.e., when its upgrade bar has been filled), you can increase that building’s rank by paying a large sum of resources. This process is similar to building a structure – pay the resources and wait down the timer – and bam, new, better building. While expensive, ranking up is very important to progression in the game as it vastly increases a building’s base yields and unlocks further growth.
To help you determine which buildings can be upgraded based on your current resource pool, watch out for arrows like these:

Green arrows denote that a building can be upgraded, while purple arrows mean that a building can be ranked up. Never let your buildings stagnate.
As you progress through the game, you’ll find that upgrade requirements become more and more demanding. The most common roadblock you’ll run across is when buildings require another facility to be at a specific level:

In this case, ranking up this house requires a level two temple. Luckily, you can tap on each of the prerequisite icons and then tap on the hyperlinked text to be taken to the structure in question.
Note that upgrades don’t carry over between villages. Yes, this includes upgrades bought with scales and gems.
Services
Houses produce people, farms produce food, sawmills make food, and quarries yield stone. But those aren’t the only building types we have. After all, people will need bridges to cross rivers, town squares to meet up and discuss, temples to worship in, and so much more.

These structures – which I’ll refer to as services – may not produce anything, but they’re still vital to your town’s development:
- Services offer a passive buff to other production methods. Bridges, for example, may increase base resource generation speed. Note that, unlike facility upgrades, you must completely fill all of a service’s bars before its buff is upgraded.
- Services sometimes serve as prerequisites for ranking up your other structures.

Unlike your regular buildings, services don’t receive any benefit from individual upgrades. You need to max out both bars before you get the listed bonus.
The upgrade arrows (green and purple, if you’ll remember) will be of great help here as they can indicate what services you have, in case you forgot.
Goals
Each town you establish has certain goals that are pivotal to its development. These goals can be seen at the top of your screen, like so:

These goals denote the tasks you need to complete before a town can be considered “complete” and you can move on to a bigger and better place. Doing these tasks isn’t a thankless job, though, and each completed task nets you some neat prizes (usually gems or Monster Eyes).
While the tasks are self-explanatory, you can save yourself some time by tapping on an unfinished task. This will bring you to the building or requirement in question. Whenever you finish a task, its background will become green, and you can claim your prize just by tapping the task in question.
Each completed goal will fill up the town progress bar located at the very top of the screen:

As each town provides even more room for growth as well as new game mechanics, completing your town goals should always be your main priority.
Migration
Once all town goals have been met, a new button will appear at the top of your screen where the progress bar used to be. Tap on the button to go to the world map and start building your next town.

Each town you complete not only allows you to build new buildings and explore more of the game, but it also provides you some gold income. We’ll talk more about gold later.
Optimal Resource Flow
Upgrading buildings is all well and good for keeping a steady flow of resources, but there are a lot of ways to earn even more goodies for our towns. Here’s what you can do to maximize the flow of wealth in your villages.
Quick Tips:
- Worker control can help you focus on a specific resource and can even avert deficits by reassigning people working at refineries elsewhere.
- Don’t forget to assign workers whenever you upgrade a building. Each worker improves a building’s efficiency, and an upgraded building without a full staff of workers wastes a lot of potential income!
- To avoid deficits, ensure that your raw material facilities (sawmills and quarrier) can keep up with the demand of their respective refineries. Keep a close eye on the respective raw material site when upgrading a refinery.
- Always keep the double resource bonus running. You also get a box of freebies after you’ve watched 3 ads this way. You can stack up to 12 hours’ worth of doubled resource gain.
- While Idle Town Master has AFK gains, the game will only store 2 hours’ worth of resources by default. Be sure to check in every so often or just leave the game running idle if you can.
- The bard will occasionally show up and offer you one of three items in exchange for watching an ad. You need to select which item you want before you can watch the ad.
- You can exchange Monster Eyes for card draws from the witch. This nets you large amounts of resources and can even allow you to attack other players for rare items like chests, keys, gems, or a whole bunch of pickaxes.
- As you progress through the game, you’ll gain the ability to get more minor arcana (multiplier) cards as well as fuse them to make cards of a higher value. I suggest getting rid of your lowest-value cards to make your card draws more consistent. Note that once you have at least 10 cards, the card draw minigame will only factor in the 10 highest-value cards you have.
- Monster Eyes regenerate at the rate of one per hour, though you can also accomplish town goals to get more of them as well as dig up more in the mines.
- When raiding another player’s village, you’re limited to 20 attacks. Each hit on a building will yield resources.
- The high-quality reward is hidden somewhere in the town, and you can see what this reward is for each player by watching the speech bubbles when selecting a target. You must break buildings completely to see if that reward is in the building.
- You can watch an ad to get 20 more attacks.
- The mining minigame lets you excavate resources, monster eyes, gems, and scales, which are used for advanced building upgrades. To get a resource, break the tile it’s trapped in.
- You can use picks, bombs, and drills to mine. Pickaxes regenerate on their own, while bombs and drills will need to be found or earned.
- Mining also gives you access to one of three gems (ruby, sapphire, emerald), which are important for castle and hero upgrades. You’ll need to either attack other players or trade with them to get the two gems you don’t have.
- Heroes come from chests, which need keys to unlock. You can get both from mining, raids, or the bard.
- Heroes gain stats as they level up and ascend. Strengthening heroes requires gold, duplicates of that hero, and rubies/sapphires/emeralds.
- You can dispatch heroes on adventures to bring back gold, resources, and more. Each adventure has three resolutions and prize paths; to pick a resolution, the hero must meet or exceed the listed stat.
- Unique adventures become gold-generating locations after being cleared, while regular adventures pop up from time to time on the world map.
- Finishing an adventure makes a hero tired. Tired heroes can’t be dispatched again until they’ve recovered.
Workers
While upgrading buildings is vital to improving your resource flow, it’s equally important to remember to assign workers to upgraded buildings.

Remember: each worker you assign to a building improves its resource output, and neglecting to assign workers to newly upgraded and especially ranked-up buildings means a large loss in potential profit. Don’t ever forget to staff your buildings, especially after you upgrade them!
Thankfully, there’s a nifty button that will tell you if you have idle workers. Whenever you see this red circle on this button…

…it means that there are workers that can be assigned to a building with empty slots. You can also tap on that button to bring up the staff panel for all your buildings, allowing you to easily add building staff. If needed, you can also redirect your workforce – this is great especially when there’s a deficit of a raw resource.
And speaking of deficits…
Deficits
Refined materials, like planks or cut stone, require you to sacrifice some of their respective raw material to produce them. If you’re not careful, this can lead to a deficit of materials where your demand outweighs your supply.

Deficits can lead to slow growth as certain upgrades or buildings will still require the raw material that the refinery demands. To avoid this problem, keep a close eye on the production levels of your raw material sources when upgrading their respective refineries.
Double Resource Boost
Almost every idle simulation game has a way for players to passively multiply their resource gain by watching an ad, and you’ll be happy to know that this option is present in Idle Town Master.

Tap on the “2x” icon on the lower right of the screen to initiate your double gains. For each hour of doubled gains, you’ll need to watch a 30-second ad. You can watch multiple ads to stockpile your double resource time, and you can have up to 12 hours of doubled gains at once.
Apart from doubling your gains per hour for every ad you watch, you also get a box of bonus resources – Monster Eyes mostly – once you watch three ads. This box resets every day, and you want to be doubling your resource gain anyway.
Finally, if you really want to, you can pay real money to make the double gains permanent.
AFK Gains
As with most idle games, Idle Town Master will continue to generate and store resources even when you’re not playing the game. You can even watch an ad to multiply these resources.

However, Idle Town Master will only hold 2 hours’ worth of resources by default, and increasing this cap requires you to pay real money. Because of this, your options for AFK gains are pretty much restricted to logging into the game every 2 hours to collect your spoils or leaving the game running whenever you can.
The Bard
From time to time, a bard will appear in your town square, tempting you with one of three prizes.

Of course, you’ll need to watch an ad to claim your freebie. Do note that you need to tap on the prize you want before the option to watch the ad appears.
Card Draw
You can exchange the Monster Eyes you get for random divination cards from the witch. You can access this menu by tapping on the witch hat icon at the bottom of the main menu:

This will bring you to the card draw screen, where you can exchange Monster Eyes for random cards from the witch. Each Monster Eye you trade away will grant you two (sometimes three) cards:
- The first, topmost card will show what prize you get – in most cases, it will be a picture of a resource.
- Sometimes, it will be a clock, which is a fast-forward bonus that also nets you as many resources as you would have earned during that time.
- Sometimes, it will be a sword, which will initiate a raid on another player. We’ll get to that in a bit.
- The second card shows a Roman numeral and is the multiplier for your prize. The higher this is, the bigger your bonus. We’ll talk more about these in a bit.
- The third card doesn’t appear all the time, but when it does, it’ll flip over to show a play button. This will let you watch an ad to vastly increase the number of prizes you get. Always do this as the increased payoff is huge.

In the beginning, your multiplier cards are restricted to ones and twos. However, as you continue playing, you’ll gain the ability to get more minor arcana cards as well as fuse these cards, allowing you to draw even higher multiplier numbers. Three cards of one value will make one of the next value; three ones make one two, and so on. Each fusion costs some Astral Essence, with higher level fusions consuming more essence.

I suggest fusing your lower-level cards to make your card draws more consistent. Do also note that once you have at least 10 cards, the card draw will only include the top 10 cards in your minor arcana deck, so switch strategies as needed.
While card draws are a great way to get a huge amount of resources, you’ll need to spend your limited supply of Monster Eyes to draw cards. To get more Monster Eyes, you can:
- Monster Eyes regenerate slowly on their own, at the rate of one every hour.
- Some town goals give out Monster Eyes.
- The bard sometimes offers Monster Eyes.
- Tentacle tiles in the mining minigame will drop Monster Eyes when broken.
- You can exchange gems for Monster Eyes in the cash shop.
Note that passive Monster Eye generation will only hold up to 10 eyes. Be sure to spend all of your eyes before you log off.
Raiding
On rare occasions, you’ll pull a sword card from the card draw. This lets you attack another player!

After drawing the card, you’ll immediately be taken to the world map where you’ll be given a choice of three villages to attack. You can preview the potential best reward for attacking each village by watching the shifting bubbles above each village.
Once you’ve decided which village to attack, you’ll be taken to this screen:

During the attack, tap on a building to damage it. Each tap costs some stamina, which is represented by the swords visible at the bottom of the screen. Damaging a building adds some resources to your booty, but to find the best reward (as shown in the attack selection screen), you’ll need to completely break buildings. As towns have multiple buildings and it uses a lot of stamina to break them, it’s often a matter of luck whether you can get the best reward or not. Rest assured that you’ll always walk away with something as just damaging buildings nets you resources.
Once you’re out of stamina, you can choose to end the attack or watch an ad to gain 20 more swords.
Mining
Once you’ve fully repaired the Excavation site in the second village, you’ll be able to play the mining minigame. To play this mode, tap on the witch hat at the bottom of the main menu, then tap the pickaxe.

The mining minigame in Idle Town Master is very similar to that of other mobile games, like Legend of Slime. Essentially, you’re given a set of tools – mostly pickaxes – to excavate tiles and bring back various treasures like basic resources and more importantly, scales. To dig up tiles, simply tap on any illuminated tile or drag a tool to that tile. If a tile contains treasure, simply break the tile to claim the goodies for yourself.
To progress deeper into the mine, you’ll need to break a tile on the lowest level, below the hazard line.

The tools you have for digging are:
- Pickaxes are your most basic digging tool. With a pickaxe, simply tap on the tile you want to break; dirt tiles will yield with a single tap, while stone tiles require two taps. While slow and cumbersome, pickaxes are also free – they regenerate over time.
- Note that pickaxes only work on illuminated tiles – this means a tile adjacent to an empty space.
- Bombs are a powerful AOE tool. When placed, a bomb will detonate in a large AOE, breaking every tile in that radius (yes, including stone) and allowing you to claim every resource that it unearthed. Ideally, you should save bombs for when there are large clusters of goodies to claim that would take too much effort for pickaxes to dig through. However, unlike pickaxes, bombs are limited and do not regenerate with time. You’ll have to find more bombs either through regular gameplay or as a treasure from the mines.
- Drills are unmatched when it comes to breaking vertical tiles. When placed, a drill will break every tile in its column as well as the two adjacent tiles at the bottom row. Like bombs, drills are ideal for claiming lined-up resources without spending too many pickaxes. And like bombs, you’ll need to find drills as quest rewards, bonuses, or in the mines themselves.
Finishing all your pickaxes is very important as mining is not just the only source of scales (the purple stuff), which are used for more advanced building upgrades, but also gems, chests, and keys. Each player’s mine has one of three types of gems – rubies, emeralds, and sapphires – which are used for castle and hero upgrades. Each player’s mine only has one of these three, meaning that you’ll need to find other ways to get the two you don’t have, such as trading, specific castle facilities, raiding, and more.
Heroes and Adventures
Once you’ve unlocked the castle (more on that in the next main section), you’ll be able to recruit heroes to your cause.
Let’s talk briefly about heroes here. Heroes are pulled from chests, which require keys. You can get both of these from the mines, from the bard, or from attacking other players.

As you can see here, each hero has stats: Strength, Wits, Knowledge, Mysticism, and Charm. To raise these stats, you can level up a hero by feeding it gold. At certain levels, it will need to ascend, which requires a duplicate of itself as well as rubies, sapphires, or emeralds. Each ascension unlocks another star for that hero, which also unlocks skills – in the image above, the rogue’s skills are Pickpocket, Street Child, and Daredevil.
Now, back to adventures. Around the same time you unlock heroes, you’ll unlock the ability to go on adventures. These appear on the world map as locations (complete with red arrow) that you can visit with your heroes.

When you tap on an adventure, you’ll be prompted to select a hero as well as a resolution for that adventure. There are three resolutions per adventure, and the stats of your assigned hero will determine what resolutions you can pick. Each resolution offers different prizes, so pick the choice that would benefit you the most.

There are two kinds of adventures:
- Unique adventures are one-time adventurers that allow you to select one of three prizes. No matter which prize you pick, a unique adventurer will become a territory that produces gold for you after its completion.
- Regular adventures pop up occasionally on the world map and can be challenged as you please.
Completing an adventure will make a hero tired, which means they won’t be able to go on adventures for a while.
The Seat of Government
What’s a ruler without a place to rule from? After you start your third town, you’ll be introduced to your castle, which serves as your seat of power and unlocks A LOT more game features.
Quick Tips:
- The castle is comprised of several rooms, each of which provides passive benefits in a specific aspect of the game.
- A hero can be assigned to each room. Heroes will provide different benefits depending on their stats and the room they’re assigned to.
- Upgrading and building rooms is similar to village upgrades. However, castle upgrades cost gold and gems instead of the basic resources.
- Gold is passively generated by each village you’ve completed. The higher the level of the village, the more gold it generates.
- Completing adventures rewards gold; unique adventures also produce a daily tithe.
- Some castle upgrades focus on gold production, such as the Council Chamber and Marshal upgrades.
- Because of how slow gold production can be, I suggest focusing on rooms and upgrades that complement your playstyle.
Castle Rooms
Your castle is comprised of several rooms, each of which is in different states of disrepair. The first thing you’ll need to fix is the throne room, which will introduce you to the whole room-fixing mechanic.

Each room in your castle provides bonuses towards a specific aspect of the game. Not only that, but they also have a slot for a hero, who provides more bonuses, as well as room upgrades, which give even more passive buffs. Building these rooms is easy too; it’s just like building and upgrading in villages, only now it costs gold and gems.
The sheer freedom of choice when it comes to what room to fix first can be overwhelming. To help you make sense of what’s what, here’s a reference sheet detailing the different castle rooms, what aspect of the game they help, what the prerequisites for that room are, what an assigned hero does, as well as a list of upgrade effects.
| Room Name | What Does It Do? | Prerequisite | Hero Bonus When Assigned | Upgrade Effects |
| Throne Room | Tech center; prerequisite to every other room | None | AFK gains in towns | Passive gold and gem generation (the two gems you don’t have) |
| Council Chamber | Improves Village Production | Throne Room (pretty much free with tutorial) | Resource generation in towns | Daily village gold generation, reduced building costs, unlocks special upgrades |
| Tavern | Helps with adventures | Throne Room (pretty much free with tutorial) | Adventure rewards | Unlocks new heroes, faster and more profitable adventures, faster hero recovery from “Tired” |
| War Room | Better raids | Throne Room Level 2 | Number of attack taps during raids | More building damage, gold generation from raids |
| Astral Chamber | Better card draws | Throne Room Level 2 | Faster Monster Eye generation | Bigger Monster Eye caps, uncaps multipliers for card draw, passive Astral Essence generation |
| Royal Garden | Food production | Throne Room Level 2 | Food production rates in towns | Faster farms, faster wood generation, food refinery performance, unlocks special upgrades |
| Royal Carpentry | Wood and plank generation | Throne Room Level 2 | Wood and plank production rates in towns | Special upgrades for sawmills and carpentry shops |
| Masonry Guild | Stone and refined stone production | Throne Room Level 2 | Stone, refined stone, and clay production rates in towns | Faster construction time in both villages and the castle, special upgrades for stone-related buildings |
| Steelworks | Advanced upgrades for buildings | Throne Room Level 3 | Metal production in towns | Advanced upgrades for refineries and metal-related structures |
As you can see, there are a lot of rooms, each of which address a particular aspect of your villages.
Earning Gold
Now, let’s talk about earning the gold you need to fix up your castle. There are three main ways to earn gold: daily tithes, adventures, and castle upgrades.

The first way to earn gold is via daily tithe. Each village and cleared unique adventure on the world map will generate gold for you daily, no questions asked. The higher the level of the village, the more gold it’ll produce.
The second way to produce gold is via adventures. Once resolved, unique adventures will add to your daily tithe, and random adventures can give you irregular spikes of gold. If you really need gold, some adventure resolutions can give you more of the stuff, so keep a close eye on the prizes attached to each choice.
Lastly, the castle itself can produce or help produce gold. For new players, I suggest prioritizing upgrading the throne room (for the passive gold generation), building and upgrading a Council Chamber (for more taxes), and assigning a hero with high Charm in the tavern (for better adventure yields). Later on, you can get the Marshal upgrades that allow you to generate gold during raids for an even bigger payout.

If you looked at all these and thought, “Wow, gold generation is slow”, you’d be right. Thus, I strongly suggest studying your castle thoroughly and gunning for key upgrades that offer the most benefits to your play style!
Rule Your Way
While it can get very busy, Idle Town Master is a game where you can always do as you please, whether that’s watching your villagers run about doing tasks or rapidly expanding your settlements. Ultimately, there are no failure conditions, no leaderboards, and no time pressure, so feel free to kick back, relax, and play the game the way you want to!

That concludes my beginner’s guide to Idle Town Master, and I hope I was able to help you get past the initial hurdles of building your first few villages. If you have any suggestions on how to improve this guide (especially for completely new players to the genre) or want to share any of your own tips and tricks, make yourself heard in the comment section!
Cid
Sunday 16th of June 2024
Guys, add me in the game: SACARFACE#8638 I need friends for mission. Thank you!